Showing posts with label beer. Show all posts

Thursday, February 11, 2016

Coffeepot beer.


The process of brewing coffee is very similar to the way beer is brewed. This mini-homebrew recipe below only produces a small batch of beer, but very worth it since you most likely have most of these supplies in your kitchen already!  

Equipment:

1 - standard electric drip coffee maker (with water heating compartment and hot plate)
1 - wooden rolling pin
1 - coffee filter
1 - saucepan, larger than 2 quarts
2 - One-quart canning jars with lids
2 - Six-inch squares of cheesecloth
2 - rubber bands
½ - gallon filtered water (not distilled)

 Ingredients:
1¼ - cups malted barley (or can use base malt)
5 to 7 - hop pellets
½ - packet of champagne yeast (or can use baker’s yeast)

Malted barley acts as the sugar content for fermentation. The hops will help preserve the beer and give it added flavor. Make sure you clean everything thoroughly before starting, because any kind of small residue can affect the process.  

Directions:

1. Start with the 1¼ cups malted barley.
2. Take the rolling pin and roll gently just to crack the grains, but don’t over roll to get the consistency of flour.
3. Place the grains in the coffee pot.
4. Put 2 cups of filtered water into the coffee machine and turn it on.
5. The hot plate and water-heating chamber with temperatures of 170°F and 150°F are perfect temperatures for brewing.
5. Then wait for the coffee maker to brew for about an hour before it shuts off.
The coffee maker will break down the grains and complex sugars into fermentable sugars.
6. Strain the liquid through the coffee filter and put the filter full of grain into the filter basket.
7. Pour the strained liquid back into the water-heating chamber.
8. Add 1 of cup water to the strained liquid in the chamber and start the coffee machine again.
9. After the liquid flows into the coffee pot, turn off the machine and pour the liquid back into the chamber.
10. Repeat 5 times, adding another cup of water each time.
11. Keep an eye on the coffee maker through this "lautering process."
12. This is where the hot water washes over the grain extracting the sugars.
0dh.The liquid that comes out is called "wort," or sweet liquor.
14. Place the wort in a saucepan and when it comes to a rolling boil, add 5 to 7 pellets of hops.
15. Boil for an additional 30 minutes, then turn off the burner.
16. Stir until mixed then pour the wort into the canning jar.
17. Pour down the side of the jar without splashing to keep all the ingredients contained.
18. Next, place the jar into the sink filled with cold water.
When the temperature reaches 60-70°F, screw on the top of the jar and shake vigorously.
19. Take off the top and add yeast.
20. Put a piece of cheesecloth over the top of the jar and secure it with a rubbed band.
21. Place jar in a cool, dark place and the liquor will become beer in 5-7 days.

If you try brewing beer in your coffee maker let us know how it turns out!
This is a great way to learn and understand the process of how beer is made.
I simplified the instructions above; for more details read the article. Now this is a long process that is time consuming and you will only have created a small amount of beer. This process will be fun to try, however if you’re really serious about making beer.

----------------------------------
Yet another method.


10. Beer
This sounds insane, but bear with us. Southern Fried Science has produced the definitive article on “how to brew beer in a coffee maker, using only materials commonly found on a modestly sized oceanographic research vessel.” They recommend using cereals for grains, vegemite for malt, and seaweed for hops. Amazing.


  1. Grind up your ‘grains’ (but not so much that it becomes powder).
  2. Place your ‘grains’ in coffee pot (not the filter basket, the carafe).
  3. Run 2 cups of clean water through coffee maker and let it sit on the hot plate for an hour. This releases all the good chemicals from you ‘grains’ and creates a fluid called wort.
  4. Strain the wort through the coffee filter and place the filter full of ‘grain’ into the filter basket. Add the ‘malt’ to the filter basket. Pour the strained liquid back into coffee maker and add 1 cup of water.
  5. Run the wort through the coffee maker 5 times, each time adding 1 cup of water.
  6. Pour the wort into the saucepan and boil for 45 minutes. Two minutes before boiling is done, add the hops.
  7. Carefully pour the wort into the canning jars.
  8. Let the wort cool to between 60 and 70 F. Once it is cool enough to touch the outside of the jars without burning, pitched the Bakers’ Yeast into the mixture.
  9. Seal jar with a handkerchief and rubber band over the mouth, and let sit for 3 to 5 days.
  10. And table spoon of sugar to the jar and seal with the lids, making sure they’re air tight.
  11. Store in a cool, dark place where it will not be disturbed for a week.
So the next time you’re in a hotel and reaching for the phone and steeling your nerves to fork over $30 for a crappy pizza, go for the coffee maker instead. And if you’re willing to throw the clothes iron in to the mix, it opens up all sorts of possibilities. Now go out there, and cook some dinner in the most backward way imaginable.

Tuesday, October 20, 2015

Coffemaker meals.


Coffeemaker meals and etc.

Table of Contents
---------------------------
Intro: Coffeemaker meals and etc
Step 1: Coffee or tea. but
Step 2: Making beer in a coffee maker
Step 3: Making cheese
Step 4: Coffeepot oatmeal
Step 5: Coffeemaker eggs
Step 6: Grilled cheese NOT!
Intro: Coffeemaker meals and etc..

Just a couple of coffee maker options for cooking various foods. Oatmeal, eggs. and more to come.
Note: for making pasta in a coffee maker see:www.instructables.com/id/Coffee-maker-pasta/
for making soup in a coffee maker see: www.instructables.com/id/Tuna-noodle-coffepot-soup/
for making confederate coffee: http://www.instructables.com/id/Confederate-coffee-or-tea-recipe/
Idea: You can take some tomato puree or the like, add basil, onion/garlic powder, salt, pepper,and oregano then put the mixture in the coffee make to warm up and you have instant pasta sauce.
You can always poach some fish in the coffeemaker also.


Step 1: Coffee or tea. but.....
You can certainly use a coffee maker for cooking but, a coffee maker will have the taste of coffee that will not enhance the flavor of the food. You can flush out the unit a
zillion times till you get most of the taste out. Preferably you can get a separate unit that has not been used for coffee. Usually they are inexpensive. Be sure and put a
sign on the unit that says "NOT FOR COFFEE USE!!" Good luck.


Step 2: Making beer in a coffee maker.
How to brew beer in a coffee maker, using only materials commonly found

Materials
(1) electric drip coffee maker with a water-heating compartment and a hot plate
(1) wooden rolling pin (marble is too heavy)
(1) coffee filter
(1) saucepan, larger than 2 quarts
(2) 1-quart canning jars with lids
(2) 6-inch squares of cheesecloth
(2) rubber bands
(1/2 gallon) filtered-not distilled-water
Brewing ingredients
1 1/4 cups regular oatmeal
1/2 to 1 cup sugar
1/4 cup or so oregano (can be used for hops)
1/2 packet of Champagne yeast or .baker’s yeast

Method:
Basic prep.
Gather materials.
Sanitation is key. Everything must be clean.
Grain prep:
Grind up your ‘grains’ (but not so much that it becomes powder).
Place your ‘grains’ in coffee pot (not the filter basket, the carafe).
Run 2 cups of clean water through coffee maker and let it sit on the hot plate for an hour. This releases all the good chemicals from you ‘grains’ and creates a fluid
called wort.
Wort prep:
Strain the wort through the coffee filter and place the filter full of ‘grain’ into the filter basket. Add the ‘malt’ to the filter basket. Pour the strained liquid back into coffee
maker and add 1 cup of water.
Run the wort through the coffee maker 5 times, each time adding 1 cup of water.
Pour the wort into the saucepan and boil for 45 minutes. Two minutes before boiling is done, add the hops.
Carefully pour the wort into the canning jars.
Fermentation:
Let the wort cool to between 60 and 70 F. Once it is cool enough to touch the outside of the jars without burning, pitched the Bakers’ Yeast into the mixture.
Seal jar with a handkerchief and rubber band over the mouth.
Store in a cool, dark place where it will not be disturbed for a week.
Final:
Results: A cool, smooth brew, flavored with whatever you found. It may be very bad, it may be good. It will be beer.


Step 3: Making cheese
.
I have made cheese before using the regular methods, but I wanted to try something new. If you have a second free coffee pot you can be making your noodles at the
same time. That is if you are having a pasta meal. . This is a delicate process so you need some free time or being nearby doing other things to keep an eye on it. Using
the rennet tablet lowers the temperature to curdle the milk and separate the curds from the whey.

Ingredients:
2 - tablespoons vinegar
1 - Rennet tablet. (Tablet can be crushed in the packet before using so ot makes it easier to dissolve.
10 - cups room temperature milk. (Do not use ice cold milk) (Number of cups depends on your coffee maker. mine is 12).
3/4 - cup water.
1 - Tablespoon salt.

Method.
With the coffee machine off pouyr the water into the resevoir.
Pour the milk into the carafe.
Add the crushed Rennet tablet.
Add the vinegar.
Turn on the coffee maker.
Water will go into the carafe. That will help get the milk up to temperature quicker.
Now you will need to let the milk do it's thing.
Watch carefully as you do not want the curds to burn on the bottom of the carafe.
Once the curds and whey are separated, turn off the coffee maker.
Take a large bowl and inver a solid cup in the bottom.
Place a pasta strainer basket on top.
lay a non-frizzy towel in the basket covering as much as you can.
Take the carafe and slowly empty the whole contents into the basket on top of the towel.
You will probably have a alot of liquid. Be careful.
Add some salt to the cheese.
Place the bowl unit in the fridge for the cheese to drain off more whey,
Whey can be used for making polenta or feeding the cats.
Use the cheese as soon as your meal is ready.


Step 4: Coffeepot oatmeal.

Normally this should be done with instant oatmeal, but 5 minute oatmeal seeded to do ok.
With coffee pot inserted, add twice as much water to the coffee reservoir as there is oatmeal. (be sure not to overflow the reservoir.
Turn on coffeepot maker.
In a "Oven proof " cup, add your oatmeal (one/half cup is a serving), sweetener and or fruit. (Do not put the oatmeal in the carafe!!)
Stir well.
Pour water from the coffeemaker pot into the heat proof cup until the oatmeal is well moistened, but not soupy.
Remove the carafe from the coffee maker.
Put the oven proof cup on the coffeemaker base. keep stirring until everything is well combined.
Turn off coffeemaker.
Add milk.
Eat.


Step 5: Coffeemaker eggs.

Use a larger coffee make if possible i(.e. 12 cup).
Use pasteurized eggs if possible.
Bring eggs to room temperature.
With coffeepot installed add eight or so cups of water to the resevoir.
Turn on coffeemaker.
When the reservoir is emptied, add the eggs (one or two) gently. (if the eggs crack, they will possibly be easier to peel.)
Let cook for about twelve minutes
Carefully remove the eggs with a spoon so that you do not get burned.
Turn on coffeepot maker.
Add ice to the eggs to help them cool off a bit before peeling.
Peel eggs and eat.
Note: Great for making safer mayonnaise


Step 6: Grilled cheese NOT!

This did not turn out too well. It is probably better done with an iron.
Place a piece of foil setting shiny side up. (that reflects heat better.)
Just put a touch of butter if any at all. (I put way tooooo much)
Place the butters side towards the shiny foil.
Add the cheese between the bread.
Close up the foil.
Put package on the heater plate WATCH CAREFULLY!!!!!!!!!)
After a couple of minutes turn and repeat the last step.
Remove from heater plate turn off coffee maker.
Because I used way too much butter it was all soggy, Put it in the microwave to finish.
Fail!

Monday, May 11, 2015

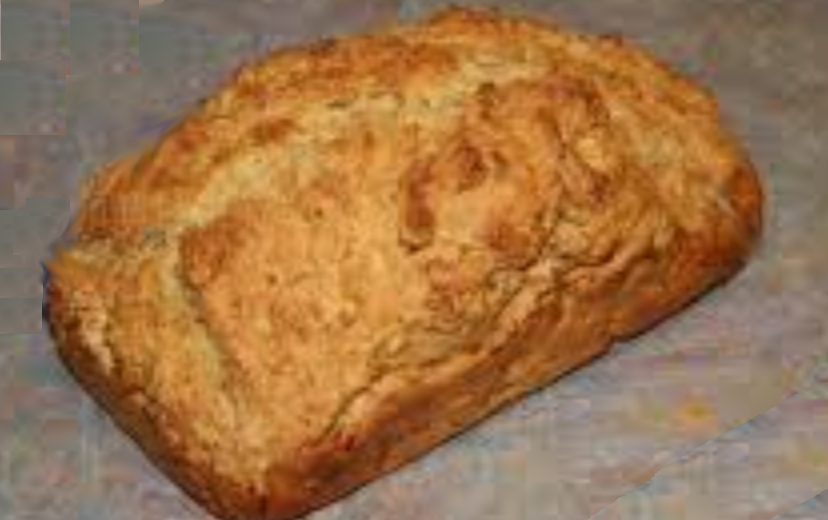
Beer bread.


Baking bread in a pre-heated casserole dish produces a sort of baker’s oven effect. Using beer adds a deep, malty flavor to the bread.
Makes one large loaf.


Another recipe:
Baking bread in a pre-heated casserole dish produces a sort of
baker’s oven effect. Using beer adds a deep, malty flavor to the bread. Makes one large loaf.
Ingredients:
3 - cups finely ground spelt flour 1 1/2 - cups coarsely ground wheat 3/4 - cups coarsely ground rye 1 - tsp. dry yeast 2.5 - cups water 1.5 - cups (3.5 dl) beer More coarsely ground rye flour or corn meal for baking
Preparation:
Mix all the dry ingredients in a mixing bowl. Slowly pour in the water, followed by the beer. Continue mixing/kneading until everything has been mixed together. The dough should be fairly loose and it will not be necessary to knead it for long.
Cover and leave overnight in the fridge, or for 3 to 5 hours at room temperature.
Pre-heat the oven to 480 Fahrenheit. Place a large iron casserole dish with a lid in the oven.
Sprinkle the coarsely ground rye flour of (corn meal) on the bottom of the hot casserole dish and pour in the dough. Place the lid on top and bake for 40 minutes. Remove the lid and continue baking until the bread has a deep golden color. Check to see if it is ready by piercing it with a sharp needle. The bread will be ready when the needle comes out clean or if there is just a small amount of dough attached to it when you pull it out.
Tip the bread out of the casserole dish and cool on a wire or cookie rack.

Friday, October 10, 2014

Livations.

Looking at making wine and beer.

Making wine:


Quicky Guide to Making Wine.
Wine making can be a lot of fun and actually very easy. I do not really drink myself, but once or twice a year can not be too bad. You pretty much make wine the way you make bread (but without the oven. So it can not be that bad for you. Wine is a fruity delight that goes great with any home cooked meal from scratch.

Notice: Some places have restrictions on how much wine for personal use you can make. I think the rule of thumb at least was one hundred  gallons per adult living on the residence to a maximum of 200 gallons. We make only a few gallons and then maybe one every few years.

Step 1: What to Get.

What to Get.
The original way to make wine was to stomp the grapes and  use the liquid from that process. You can already get fruit juice in frozen concentrated and or juice in a bottle. So why reinvent the wheel. personally I like to use apple cider.

Per 2 litres or so.
2 litres apple cider.
1 teaspoon honey. ( Do not like to use sugar as it leaves more residue to filter out.)
1/8 to 1/4 teaspoon yeast per litre. ( i just use regular yeast. but wine making yeast will do a much better job.

Also need 1 balloon per bottle.

Step 2: Fermentation.

Fermentation.
Take your materials an put them in a bottle (glass preferably.)
Stir them up well.
Take balloon and flatten it.
Take a simple pin and prick through both sides of your balloon.
turn the balloon ninety degrees and repeat for a total of four holes.
Take the balloon and securely place on top of the bottle.
Do this for each bottle.
As the wine ferments, carbon dioxide will be released so the bottles do not explode.
Place the bottles in cool dry place.
Fermentation should take about two weeks or so when the balloons stop being inflated.

Step 3: Filtering and Aging.

Filtering and Aging.
Once the fermenting is done, you will want to filter out the wine from what is in the bottom of the bottle. You may have to do this more than once. If you used giant vats, this would not be such a problem.

Remove the ballons and do that.
Then you need to reseal the bottles with the regular caps.
Refrigerate. (you may want to check on then and release any gas every so may days.)
Now let the wine age to gain some flavor.
The longer you wait the better the taste, but do not wait forever.
I have some that has been sitting in the fridge for more than a year.
Gosh it's good.

Step 4: Taste Your Wine.

Taste Your Wine.
You will want to pour some wine in a glass and let it aerate a bit.
Once you have done that take a sip and swirl in your mouth.
You know what to do next!

Making beer:


Yet Another Home Made Beer.
Notice: Almost done: just have to add some pictures.

We have made wine before, but never made beer. To be honest, I detest the taste of beer. We set out to make something that could be palatable by all.  We have made several departures from the regular beer making method. We wanted to use what we had on hand. such things as the traditional hops are not used. In our research, we found this departure was done quite a lot.Beer and wine making ore sort of alike in an oversimplified way, but beer is a bit more involved.

Make beer  in a coffee make see:  https://www.instructables.com/id/Coffeemaker-meals-and-etc/

Step 1: Sweet Extraction Bath.

Sweet Extraction Bath.
Traditionally from what understand is that 170 degree Fahrenheit water is showered over the base malts and raw meal which is then collected. Here we are going to give our base of good old fashion oatmeal a bath in 170 degree Fahrenheit water and then strain the liquid out of the mixture instead. probably need to strain it twice. once to get out the thick stuff and then a second time with filter paper to get out the residue so the liquid is as clear as possible.

Note: Throughout this whole process, make sure your equipment is clean!!!

Step 2: Flavor Bath.

Flavor Bath.
Now we are going to use the strained liquid from the first step, but add some herbs such as oregano, basil, and maybe onion powder. Whatever the final ingredients, it should be very interesting. This mixture we will boil twice. First for the bitterness and secondly for the flavor.

We will boil this mixture sometimes known as wort for about an hour. We will add our ingredients in three stages.

At the start: 1 cup lemon juice.
Twenty minutes to the end, the spices all but the oregano. (we are using basil and several secret herbs.)
Five minutes to the end, we will add the oregano..

Note: Watch carefully or you might have a boil over accident.

Step 3: Fermenting.

Fermenting.
At this point we will add the yeast for the mixture to ferment. We made a bit of sweetness to aid in the fermentation of the beer. This usually takes about two weeks. You will want to add an airlock to let out the carbon dioxide so the tank is less likely to explode from the pressure created during the fermentation.

Note: Plants love carbon dioxide. That is why when you talk to your plants they grow better. The plants are just feeding off the carbon dioxide.

Step 4: Carbonization.

Carbonization.
Now the liquid mixture is transferred to the carbonization tank being careful not to transfer any of the remnants of the fermentation process.  Can be thought of as a second fermentation but no yeast is added. we might add a little sugar to get the last bit of additional taste.

Step 5: The Tasting.

The Tasting.
Time to taste and the bottle the beer! Then right into the fridge.
Instructables will help you learn how to make anything!

Tuesday, July 29, 2014

Fake beer.

For those of us who do not drink.7up with just enough Rootbeer to tint the drink the right color.


Thursday, July 25, 2013

More coffee maker goodies

Though using a coffee maker is not technically computing, we did talk about making pasta in a coffee maker in an earlier article.  You can do other things with a coffee maker such as make, beer, cheese, oatmeal, and even hard boiled eggs. You definitely want to upgrade your geek skills in this area.


For details see: http://www.instructables.com/id/Coffeemaker-meals-and-etc/