Wednesday, December 28, 2016

Vege-milk

Coconut milk:
Serves: 4-6
Ingredients
  • 4 cups of water
  • 1.5-2 cups of unsweetened shredded coconut
Instructions
  1. Heat water, but don't boil. It should be hot, but not scalding.
  2. Put coconut in blender or Vitamix and add water. (If all water won't fit, you can add the water in two batches.)
  3. Blend on high for several minutes until thick and creamy.
  4. Pour through a mesh colander first to get most of the coconut out, and then squeeze through a towel or several thicknesses of cheesecloth to get remaining pieces of coconut out.
  5. If you have to split the water, put all the coconut that you strained out back in the blender, add the remaining water, and repeat.
  6. Flavor options- add in after all coconut has been strained out: ½ tsp vanilla extract, ½ cup fresh or frozen strawberries, 2 tsp cocoa powder + ½ tsp vanilla.
  7. Drink immediately or store in the fridge. Should be used in 3-4 days after making for best flavor and texture. Since there are no preservatives or fillers, the "cream" of the coconut milk may separate on the top if stored in the fridge. Just shake or stir before using.
Almond Milk:

  Making almond milk is actually an incredibly old process. We learned about it in culinary school as part of our training in classic French cuisine, but it was made and used long before the French transformed it into delicate blancmanges.

The process essentially involves soaking almonds in water overnight or for up to two days — the longer you soak the almonds, the creamier the milk will be. Drain and rinse the beans from their soaking water and grind them with fresh water. The resulting liquid, drained from the almond meal, is almond milk.

Real, fresh, very tasty almond milk. It's a world-changing thing.

My version of McMuffin.


2 eggs in a small non-stick pot to make the egg shape.

Saturday, August 27, 2016

Edible salad bowl.


Simple homemade bowl to hold a salad and be the chips also.

Ingredients:

1/2 - cup flour (whole wheat)
1/3 - cup water
1/8 - cup salad oil
1 - teaspoon baking soda
1 - pinch salt


Method:

Mix ingredients.
Let rest.
Roll out ingredients to a large circle.
Take a metal bowl and invert it to set on a baking sheet.
Preheat oven to 425 degrees Fahrenheit
Place tortilla over bowl.
Place unit in oven for 10-12 minutes until the shell is hard.
Remove from oven.
Remove bowl from tortilla.

Friday, August 26, 2016

Tibeten bread

Tibetan bread is like a tortilla on steroids.


Two cups of all-purpose flour (Any kind of flour is okay, like wheat, all-purpose, or self-rising. If you use all-purpose flour, you will need some baking powder.)
One tablespoon of baking powder
One cup of water

or

1.5  cup flour
1    cup water
1    tsp baking soda
a little salt

cook on medium high 10 minutes flip and cook seven more minutes
1    tablespoon olive oil
2    tablespoons water around

Sunday, August 7, 2016

Johnny cakes.


Johnny Cakes

Makes 6 large or 10-12 mini cakes

1 cup Fine stone ground yellow or white Cornmeal

1 teaspoon salt

1 Tablespoon sugar

1 1/4 - 1 1/2 and up to 1 3/4 Milk, variable

2 Tablespoons Butter or fat drippings to grease griddle

Good Quality Maple Syrup

Pre heat griddle to 375 degrees or an iron skillet or sauté pan.

Mix all ingredients until lightly just until batter like. Allow to rest 5 minutes.

--------------------------

jonakin


Ingredients:

1 cup white cornmeal
3/4 teaspoon salt
1 cup water
1/2 cup milk
Bacon drippings

Preparation:


In a medium bowl, place cornmeal and salt.
In a medium saucepan over high heat, bring water to a rapid boil; remove from heat. With the saucepan in one hand, let the boiling water dribble onto the cornmeal while stirring constantly with the other hand. Then stir the milk into the mixture (it will be fairly thick, but not runny).
Generously grease a large, heavy frying pan (I like to use my cast-iron frying pan) with the bacon drippings and heat. When pan is hot, drop the batter by spoonfuls. Flatten the batter with a spatula to a thickness of approximately 1/4 inch. Fry until golden brown, turn, and brown on the other side (adding more bacon drippings as needed).
Serve hot with butter, maple syrup, or applesauce.
Makes 4 servings.

------------------------------------------------------

Update:


Picture of Corn cakes.
FB7K5A5GZFDPY6J.MEDIUM.jpg
Nice alternative to pancakes once in a while.Sort of a fried polenta without all the boiling.  If you do not have time to make polenta, this is the perfect alternative.  Great for breakfast or even a mid day snack. In a pinch they can be a great substitute for biscuits.
Great for camping.

Ingredients:
1 Cup boiling or extra hot water (or a bit more).
1 1/2 Cups ground yellow cornmeal
Couple pinches of  salt
1/2 cup milk (if Camping use 1/4 water and 1/4 condensed or powdered milk.
Pinch or so of baking soda (optional)
2 Tablespoons  butter or frying oil.
Pancake syrup, molasses, honey, and or your favorite fruit.

Bring 1 cup of water to boil in a medium saucepan.
Combine the cornmeal, salt, boiled water, and milk in a medium bowl.
Stir well.
Melt the 2 tablespoons butter (or cooking oil) in a skillet or a cast iron griddle over medium heat.
Pour 1 tablespoon of batter  into the skillet, pancake style to cook.
Cook for 4-5 minutes on each side until edges are lacy and lightly browned using a spatula to turn.
Serve hot Pancake syrup, molasses, honey, and or your favorite fruit. (They are not half bad cold either for use in a salad.)

Enjoy!

Saturday, July 9, 2016

Cornbread


Ingredients:

1 - cup cornmeal
1 - cup flour (whole wheat flour)
2 - teaspoons baking powder
1 - teaspoons baking soda
2 - tablespoons cooking oil
Good pinch of salt
1+ - cup buttermilk (or 1 cup whole milk and vinegar)

Method:

Preheat oven to 425 degrees Fahrenheit
Mix ingredients
Pour into greased baking pan
Cook for about 10 -12 minutes untill done.
Remove cornbread from oven and let cool.
Turn off oven,

Friday, July 1, 2016

Simple custard ice cream.

Intro: Simple custard ice cream.


There are a zillion recipes for ice cream. This is just a base custard that you can add all kind of flavorings to or just eat it the way it is. We found an old ice cream maker
at a local retailer for ten dollars that they were closing out. Could not pass a chance to get it. We have been making ice cream regularly ever since. You can use the non-
ice cream machine method, but we sort of like to do it the traditional way.

Step 1: What's needed.

Ingredients:

Custard:
8 to 9 - large room temperature eggs.
1 - quart - milk, half and half, condensed milk, cream, or any combination of them.
1 - cup sugar.
2 - teaspoons vanilla or to taste.
Ice cream machine:
Plenty of Ice.
Table salt (or ice cream making salt).
Scrambled eggs:
Eggs whiles from the separated eggs. (adding cheddar cheese adds flavor and they look a bit more like scrambled eggs.)
Oil for the pan

Tools:
1 - Stove.
1 - 2 quart sauce pan
1 - Metal or heat proof whisk. (again not plastic)
1 - metal (NOT PLASTIC or anything that can melt.) bowl.
1 - regular bowl.
Spoons
Ice cream mixer.
Frying pan


Step 2: Egg separation and start the milk.
Wash your hands or use clean plastic gloves.
Break all the eggs (yolks and whites) into the extra bowl and discarding the shells.
Pour the sugar into the metal bowl.
Gently scoop out the yolks with your hand letting the whiles fall behind in the extra bowl.
The eggs go into the sugar.


Step 3: The egg mixture.
Pour the quart of your milk and or cream mixture into the sauce pan.
Set the oven to high heat (WATCH CAREFULLY).
Go to the next step while the milk is beginning to heat up.
Whisk the egg yolks and sugar till you get a very light color with the metal bowl on top of the heating milk..
Pull the bowl off the milk if it seems to get too wamm
This will force you to keep an eye on the milk and it well warm the eggs and sugar to make it easier to temper the milk into the sugar.


Step 4: The custard mixture.
When the milk is about 170 degrees Fahrenheit, turn off the heat.
Add a bit at a time of the milk to the eggs and sugar while whisking.
When about one cup of the milk is added and well combined, add the egg mixture back to the milk.
whisk well and reheat again till near bowling.
Turn off the heat.
Take sauce pan, cover it, and refrigerate it. do not put it in the freezer or it will become ice.
Let cool sufficiently.
At this point, you can throw the egg whites and oil into the pan for frying.
Fry the eggs up as you like them.


Step 5: Almost final stage.
Open the ice cream container/bowl of the ice cream maker and add the cooled custard mixture into it.
Remember it will expand, so you have to be careful how much you put in sometimes.
Re-cover the top well and return it to the machine.
Add the ice and salt in layers to the outside of the container but in the mixer.
Start the machine churning till the ice cream is firm.
Remove the container and put it in the freezer for further chilling.


Step 6: Tada!
Remove the ice cream container.
Open and serve the ice cream.
Enjoy!


Sunday, June 26, 2016

Yogurt experiment.

In the beginning.


Tools plus live active yogurt.


Incubation time.


Done: (with applesauce)


  What Do I Need to Make Yogurt?

   All you need to make homemade yogurt is a half gallon of milk and about a
   half cup of yogurt. Whole or 2% milk will make the thickest, creamiest
   yogurt, but you can also use skim milk if you like. For the yogurt, either
   Greek or regular yogurt is fine, but avoid any flavorings; stick to plain,
   unflavored yogurts.

   When you're buying yogurt, also check that it lists "Live Active Yogurt
   Cultures" in the ingredients - we need those! The live cultures are what
   actually turn the milk into yogurt. The number of cultures doesn't really
   matter; as long as there is at least one, you can make yogurt. This said,
   different strains of bacteria have different health benefits, so I
   personally look for the yogurt with the most number of cultures lists.
   Some common ones are L. Bulgaricus, S. Thermophilus, L. Acidophilus,
   Bifidus, L. Casei.

  What Equipment Do I Need?

   All you need to make yogurt is a heavy pot with a lid. I like to use a
   6-quart Dutch oven. Once the lid is on, a heavy pot like this does an
   admirable job of keeping the milk cozy and at a fairly steady temperature
   (ideally around 110DEGF) while the bacteria go to work turning the milk
   into yogurt. It also helps to put the pot somewhere insulated and warm
   while this is happening, like an oven with the light turned on or a picnic
   cooler with a hot water bottle.

   You can certainly use a yogurt maker or even a dehydrator if you have one
   - these are great for holding the yogurt at a very steady temperature as
   it incubates - but can make great yogurt without them.

  What Next?

   Once you have this basic method for making yogurt down pat, there are all
   sorts of tweaks and changes you can make. Some people like to add dry milk
   powder or gelatin for extra thickness, others like to strain off the
   liquid whey for a dense Greek-style yogurt. Using different brands of
   commercial yogurt to culture the milk can also give you subtly different
   flavors and nutritional benefits.

  How To Make Yogurt at Home

   Makes about 2 quarts yogurt

  What You Need

   Ingredients

   1/2 gallon milk - whole or 2% are best, but skim can also be used
   1/2 cup commercial yogurt containing active cultures

   Equipment

   3 quart or larger Dutch oven or heavy saucepan with a lid
   Spatula
   Instant-read or candy thermometer (one that can clip to the side of the
   pan)
   Small measuring cup or small bowl
   Whisk

  Instructions

    1. Heat the milk. Pour the milk into the Dutch oven and set over medium
       to medium-high heat. Warm the milk to right below boiling, about
       200 F. Stir the milk gently as it heats to make sure the bottom
       doesn't scorch and the milk doesn't boil over. According to the
       National Center for Home Food Preservation, this heating step is
       necessary to change the protein structure in the milk so it sets as a
       solid instead of separating.

    2. Cool the milk. Let the milk cool until it is just warm to the touch,
       112 F to 115 F. Stir occasionally to prevent a skin from forming.
       (Though if one does form, you can either stir it back in or pull it
       out for a snack!) You can help this step go faster by placing the
       Dutch oven in an ice water bath and gently stirring the milk.

    3. Thin the yogurt with milk. Scoop out about a cup of warm milk with a
       measuring cup and add the yogurt. Whisk until smooth and the yogurt is
       dissolved in the milk.

    4. Whisk the thinned yogurt into the milk. Pour the thinned yogurt into
       the warm milk while whisking gently. This inoculates the milk with the
       yogurt culture.

    5. Transfer the pot to the (turned-off) oven. Cover the Dutch oven with
       the lid and place the whole pot in a turned-off oven - turn on the
       oven light or wrap the pot in towels to keep the milk warm as it sets
       (ideally around 110 F, though some variance is fine).

    6. Wait for the yogurt to set. Let the yogurt set for at least 4 hours or
       as long as overnight - the exact time will depend on the cultures
       used, the temperature of the yogurt, and your yogurt preferences. The
       longer yogurt sits, the thicker and more tart it becomes. If this is
       your first time making yogurt, start checking it after 4 hours and
       stop when it reaches a flavor and consistency you like. Avoid jostling
       or stirring the yogurt until it has fully set.

    7. Cool the yogurt. Once the yogurt has set to your liking, remove it
       from the oven. If you see any watery whey on the surface of the
       yogurt, you can either drain this off or whisk it back into the yogurt
       before transferring to containers. Whisking also gives the yogurt a
       more consistent creamy texture. Transfer the to storage containers,
       cover, and refrigerate. Homemade yogurt will keep for about 2 weeks in
       the refrigerator.
    8. Your next batch of homemade yogurt. Once you start making your own
       yogurt, you can use some of each batch to culture your next batch.
       Just save 1/2 cup to use for this purpose. If after a few batches, you
       notice some odd flavors in your yogurt or that it's not culturing
       quite as quickly, that means that either some outside bacteria has
       taken up residence in your yogurt or that this strain is becoming
       weak. As long as this batch still tastes good to you, it will be safe
       to eat, but go back to using some store-bought commercial yogurt in
       your next batch.

  Recipe Notes

   o  Cost Breakdown: We eat about a quart of yogurt a week in our house,
   which was costing roughly $2.60 a week. A half gallon of milk makes a
   little less than two quarts of yogurt, which has been just enough to last
   us two weeks. We buy a local brand of milk that costs $3.70 per half
   gallon ($1.85 per quart), so we end up saving about 75-cents per week on
   yogurt. Nice.

   o  Holding the Temperature: If your milk drops below 110DEG while it's
   incubating, that's fine. It will take a little longer to set and might end
   up a little looser, but the bacteria in the yogurt culture will keep the
   milk from spoiling. By the way, even after 8 hours in the oven
   (overnight), our yogurt made in the Dutch oven still usually registers
   about 100DEG when I take it out of the oven!

   o  Homemade Greek Yogurt: You can make Greek-style yogurt by straining
   your homemade yogurt until it is as thick as you like. Read more about it
   here: How to Make Thick & Creamy Greek-Style Yogurt

Thursday, June 23, 2016

Wednesday, June 22, 2016

Peanut gravy./sauce


Peanuts per se are not used that much in American cooking except probably in the deep south.To really make this interesting, you could probably roast the peanuts first to have added flavor.


Put your bottle of peantust in the blender and then add some boiling chicken stock. Do not buy stock, just get some chicken and boil it to make the stock. So you get the stock and the chicken for the same price of the chicken,


Toast some bread and cook some eggs.


Put the eggs on the toast.


 Add a pice of cheese. We like swiss.


Then finally add the peanut sauce and microwave it for half a minute or so.


Breakfast!

Tuesday, June 14, 2016

Baking mistake.

Thought I would try and experiment. Made the usual biscuit dough using whole wheat,. Boiled some water with baking soda. immersed the biscuits in the baking soda and water mixture. unevenly spread the salt too much in a hurry.


Before:


Monday, May 23, 2016

Pasta machine usage.

1 - cup flour
1 - large egg
Salad oil preferably olive oil. Just enough.
Salt


Mix all till homogeneous

Flatten pasta thin enough to go into the machine. Run though at widest level.


Fold into thirds to make a square. keep doing this until it is square.

The feed though the dough slowly decreasing the width till you can see though the dough. Add flour as needed to keep the dough semi-dry.


Feed the flattened pasta into one of the pasta cutters so it becomes noodles.  Some people just use a knife. Add a little flour to keep the noodles separated.


Boil several minutes till done and all the noodles have floated to the top.


Drain and then add sauce of choice.  Melted butter and sage is one simple sauce.

Hand made shapes:  http://www.instructables.com/id/Home-made-pasta-shapes/

Udon noodles:

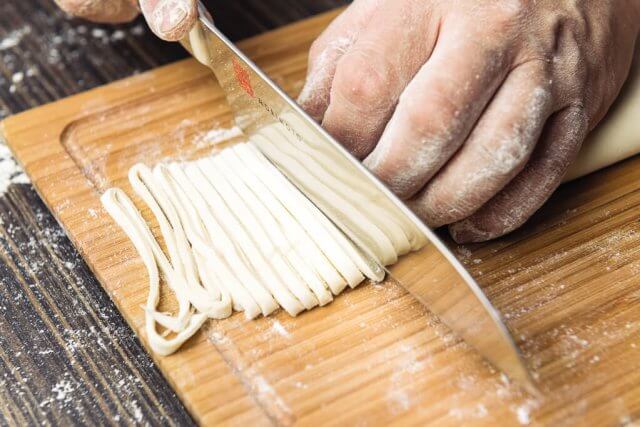
When you get the dough to desired thickness, fold dough in thirds (like a letter fold) and slice into 1/8″ thick noodles.


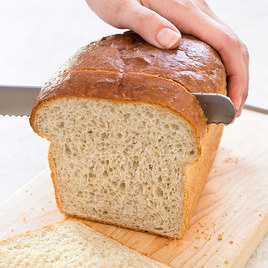
Sandwich bread.


Easy Sandwich Bread
From America's Test Kitchen, Season 15

- Makes one 8 1/2 by 4 1/2 inch loaf -

2 cups bread flour
6 tablespoons whole wheat flour (I used white whole wheat)
2 1/4 teaspoons (one 1/4 ounce packet) instant yeast
2 tablespoons melted butter, plus more for brushing the baked bread
1 teaspoon honey
1 1/4 cups water, at 120 degrees
3/4 teaspoon table salt
Egg wash (egg beaten with touch of water and small pinch of fine salt)

In the bowl of a stand mixer fitted with the paddle attachment, whisk the flours and yeast together.  Add melted butter, honey, and water to the bowl.  Beat on low for 1 minute to combine.  Raise speed to medium and beat for 4 minutes, scraping halfway through with a greased spatula (the dough will be relatively wet and sticky).

Thoroughly scrape down the sides of the bowl, cover with plastic wrap, and let rise at room temperature for 20 minutes.

Dissolve salt with 2 tablespoons water.  Add salt water to dough.  Place bowl back on to the stand mixer and mix on low for 40 seconds.  Mix on medium-speed for another minute.

Again using a greased spatula, scrape the dough into a greased 8 1/2 by 4 1/2 inch loaf pan.  Nudge the dough to the edges of the pan using the spatula.  Cover pan with plastic wrap and let sit for 10-15 minutes at room temperature.  Remove plastic wrap and allow bread to rise another 5-10 minute (this way, the surface of the bread won't touch the plastic wrap).  Preheat oven to 375 degrees.

Brush the top of the bread with egg wash.  Bake for 40-45 minutes, until bread has domed and reaches an internal temperature of 208-210 degrees.

Carefully remove bread from the loaf pan.  Brush the top and sides of the bread with 1/2 to 1 tablespoon of melted butter (for flavor as well as to soften the crust of the bread).  Let bread cool completely before slicing.

Bread is best the day it's baked but can be wrapped and stored at room temperature for up to 3 days.  Freeze for up to 1 month.

Sodium carbonate


Sodium bicarbonate is CHNaO3 while sodium carbonate is Na2CO3. Simply heat baking soda or sodium bicarbonate in a 200°F oven for about an hour. Carbon dioxide and water will be given off. Dry sodium carbonate will remain. This is soda ash. The compound will readily absorb water, forming the hydrate. You can store the dry sodium carbonate in a sealed container or with a desiccant to keep it dry or allow it to form the hydrate, as desired.

Sodium carbonate is a food additive (E500) used as an acidity regulator, anticaking agent, raising agent, and stabilizer. It is one of the components of kansui, a solution of alkaline salts used to give ramen noodles their characteristic flavor and texture. Also could be used as part of a water softener.

Chinese noodle dough:

1 cup cake or pastry flour
1 cup all purpose flour
1 cup water
1 - 2 tsp  sodium carbonate (or baking soda)
1 - 2 tsp cooking oil
1 -2 tsp salt

Sunday, May 22, 2016

Risoto


Ingredients:
Aborio rice
finely dice onions
wine or apple juice
pepper
Chicken stock or water.

Method:

  1. Heat the oil. Pour the oil into a separate, heavy 4-qt (4-L) saucepan or stockpot. Set the pan on the stove over medium-low heat.
    • Allow the oil to heat up for 30 to 60 seconds before continuing. It should not create smoke, but it should become warm enough to spread over the bottom of the pan with ease.
  2. Cook the onion. Add the chopped onion (or chopped shallot) to the hot oil. Cook, stirring frequently, for about 4 minutes or until it becomes soft.
    • In addition to softening, the onion should also become slightly translucent and more fragrant.
  3. Cook the garlic. Add the garlic to the oil and onion. Cook while stirring for another 30 to 60 seconds, or until the garlic becomes more fragrant.[3]
    • Note that the garlic may also begin turning golden-brown, but you should not allow it to darken beyond that stage. Burnt garlic can easily ruin the flavor of the dish.
  4. Add the rice and salt. Add the dry Arborio rice to the onion and garlic. Sprinkle everything with the salt, then stir well to combine.
    • Continue stirring for 2 to 3 minutes. The rice should be well-coated with oil and salt, and the edges should begin turning translucent. Note that the center should remain opaque, however.
  5. Ladle in a small portion of broth and wine. Add 1/2 to 3/4 cup (125 to 185 ml) of the warm broth to the rice, immediately followed by a splash of white wine. Cook for several minutes, or until the rice absorbs the liquid.[4]
    • Stir frequently while the rice continues to cook. Make sure that any rice gathering along the sides of the pan get turned back into the center of the mixture.
    • When it's time for the next step, the rice should begin sticking together. Drag the spoon along the bottom of the pot; the resulting trail should hold its form for at least several seconds before collapsing again.
  6. Gradually add the remaining liquid. Add the remaining broth in 1/2 to 3/4 cup (125 to 185 ml) increments, following each addition with another splash of wine.
    • Stir and cook after each addition, allow the liquid to absorb in between each one, as well.
    • After 25 to 35 minutes, nearly all of the liquid should be used and absorbed. The rice should be creamy and tender, but it should still be "al dente." In other words, it should have some firmness or "bite" in the center of the grains.
  7. Stir in the cheese and pepper. Remove the saucepan from the heat. Add the Parmesan cheese and black pepper to the risotto, then stir to combine.
    • Cover the saucepan with a lid and allow the risotto to sit for another 5 minutes off the heat.
  8. Serve with additional cheese. Transfer the risotto into individual serving dishes while it's still warm. If desired, enjoy the dish topped with additional Parmesan cheese.